Showing: 1 - 10 of 10 RESULTS
Dog Training Team

Enrichment for Agility Dogs

The Agility & Beyond Book Club is reading Canine Enrichment for the Real World by Allie Bender and Emily Strong. It’s an excellent book with lots of ideas on how to enrich our dog’s lives. After using their ideas for several months, we have several product and activity recommendations for agility handlers and their dogs.

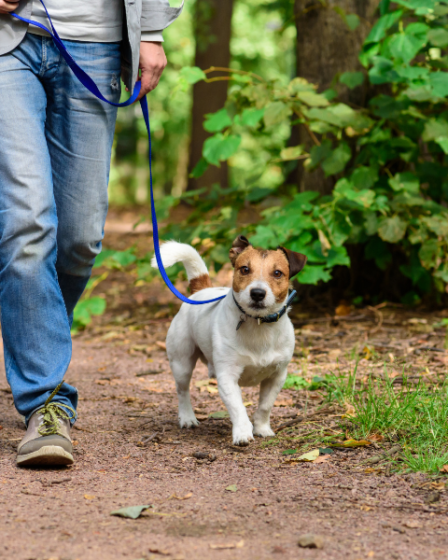
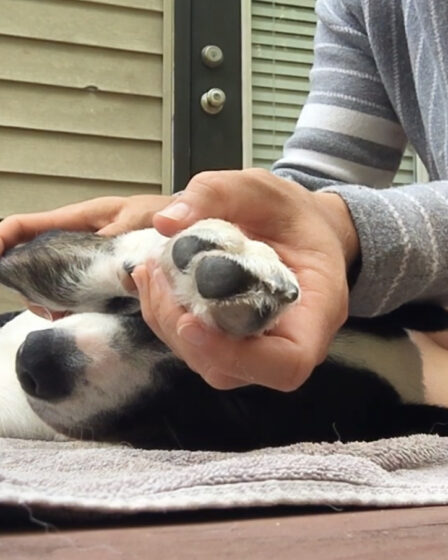
As an agility instructor and competitor, my dogs are always out-and-about. We travel weekly to multiple training buildings and have our own agility field in the backyard. We also do daily walks, many of which are off-leash in the state forests. But, I know my dogs need more than agility training and walks to live a fulfilling life. It was during rain days or recovery days (aka Diane’s office day) that I felt my dogs would benefit most from enrichment games and toys. So, I purchased a few new toys to test out – some keepers, some got adopted out.

Puzzle Games

Most were just way too simple for my dogs. For the dollars, I needed one or two that they had to work at for more than a minute! For the shelties, the Hide-n-Slide by Outward Hound is a big hit. With pieces that have to be moved separately, it takes awhile and is never quite the same day-to-day. The dogs also like the Brick Puzzle by Outward Hound, since it also has multiple ways to use, though the loose pieces got dragged around a bit. I didn’t like the Outward Hound Smart Puzzle for the same reason. Some of the puzzles with locks didn’t appeal since the connection between the lock and the drawer pull didn’t seem obvious enough.

Meal Time Games

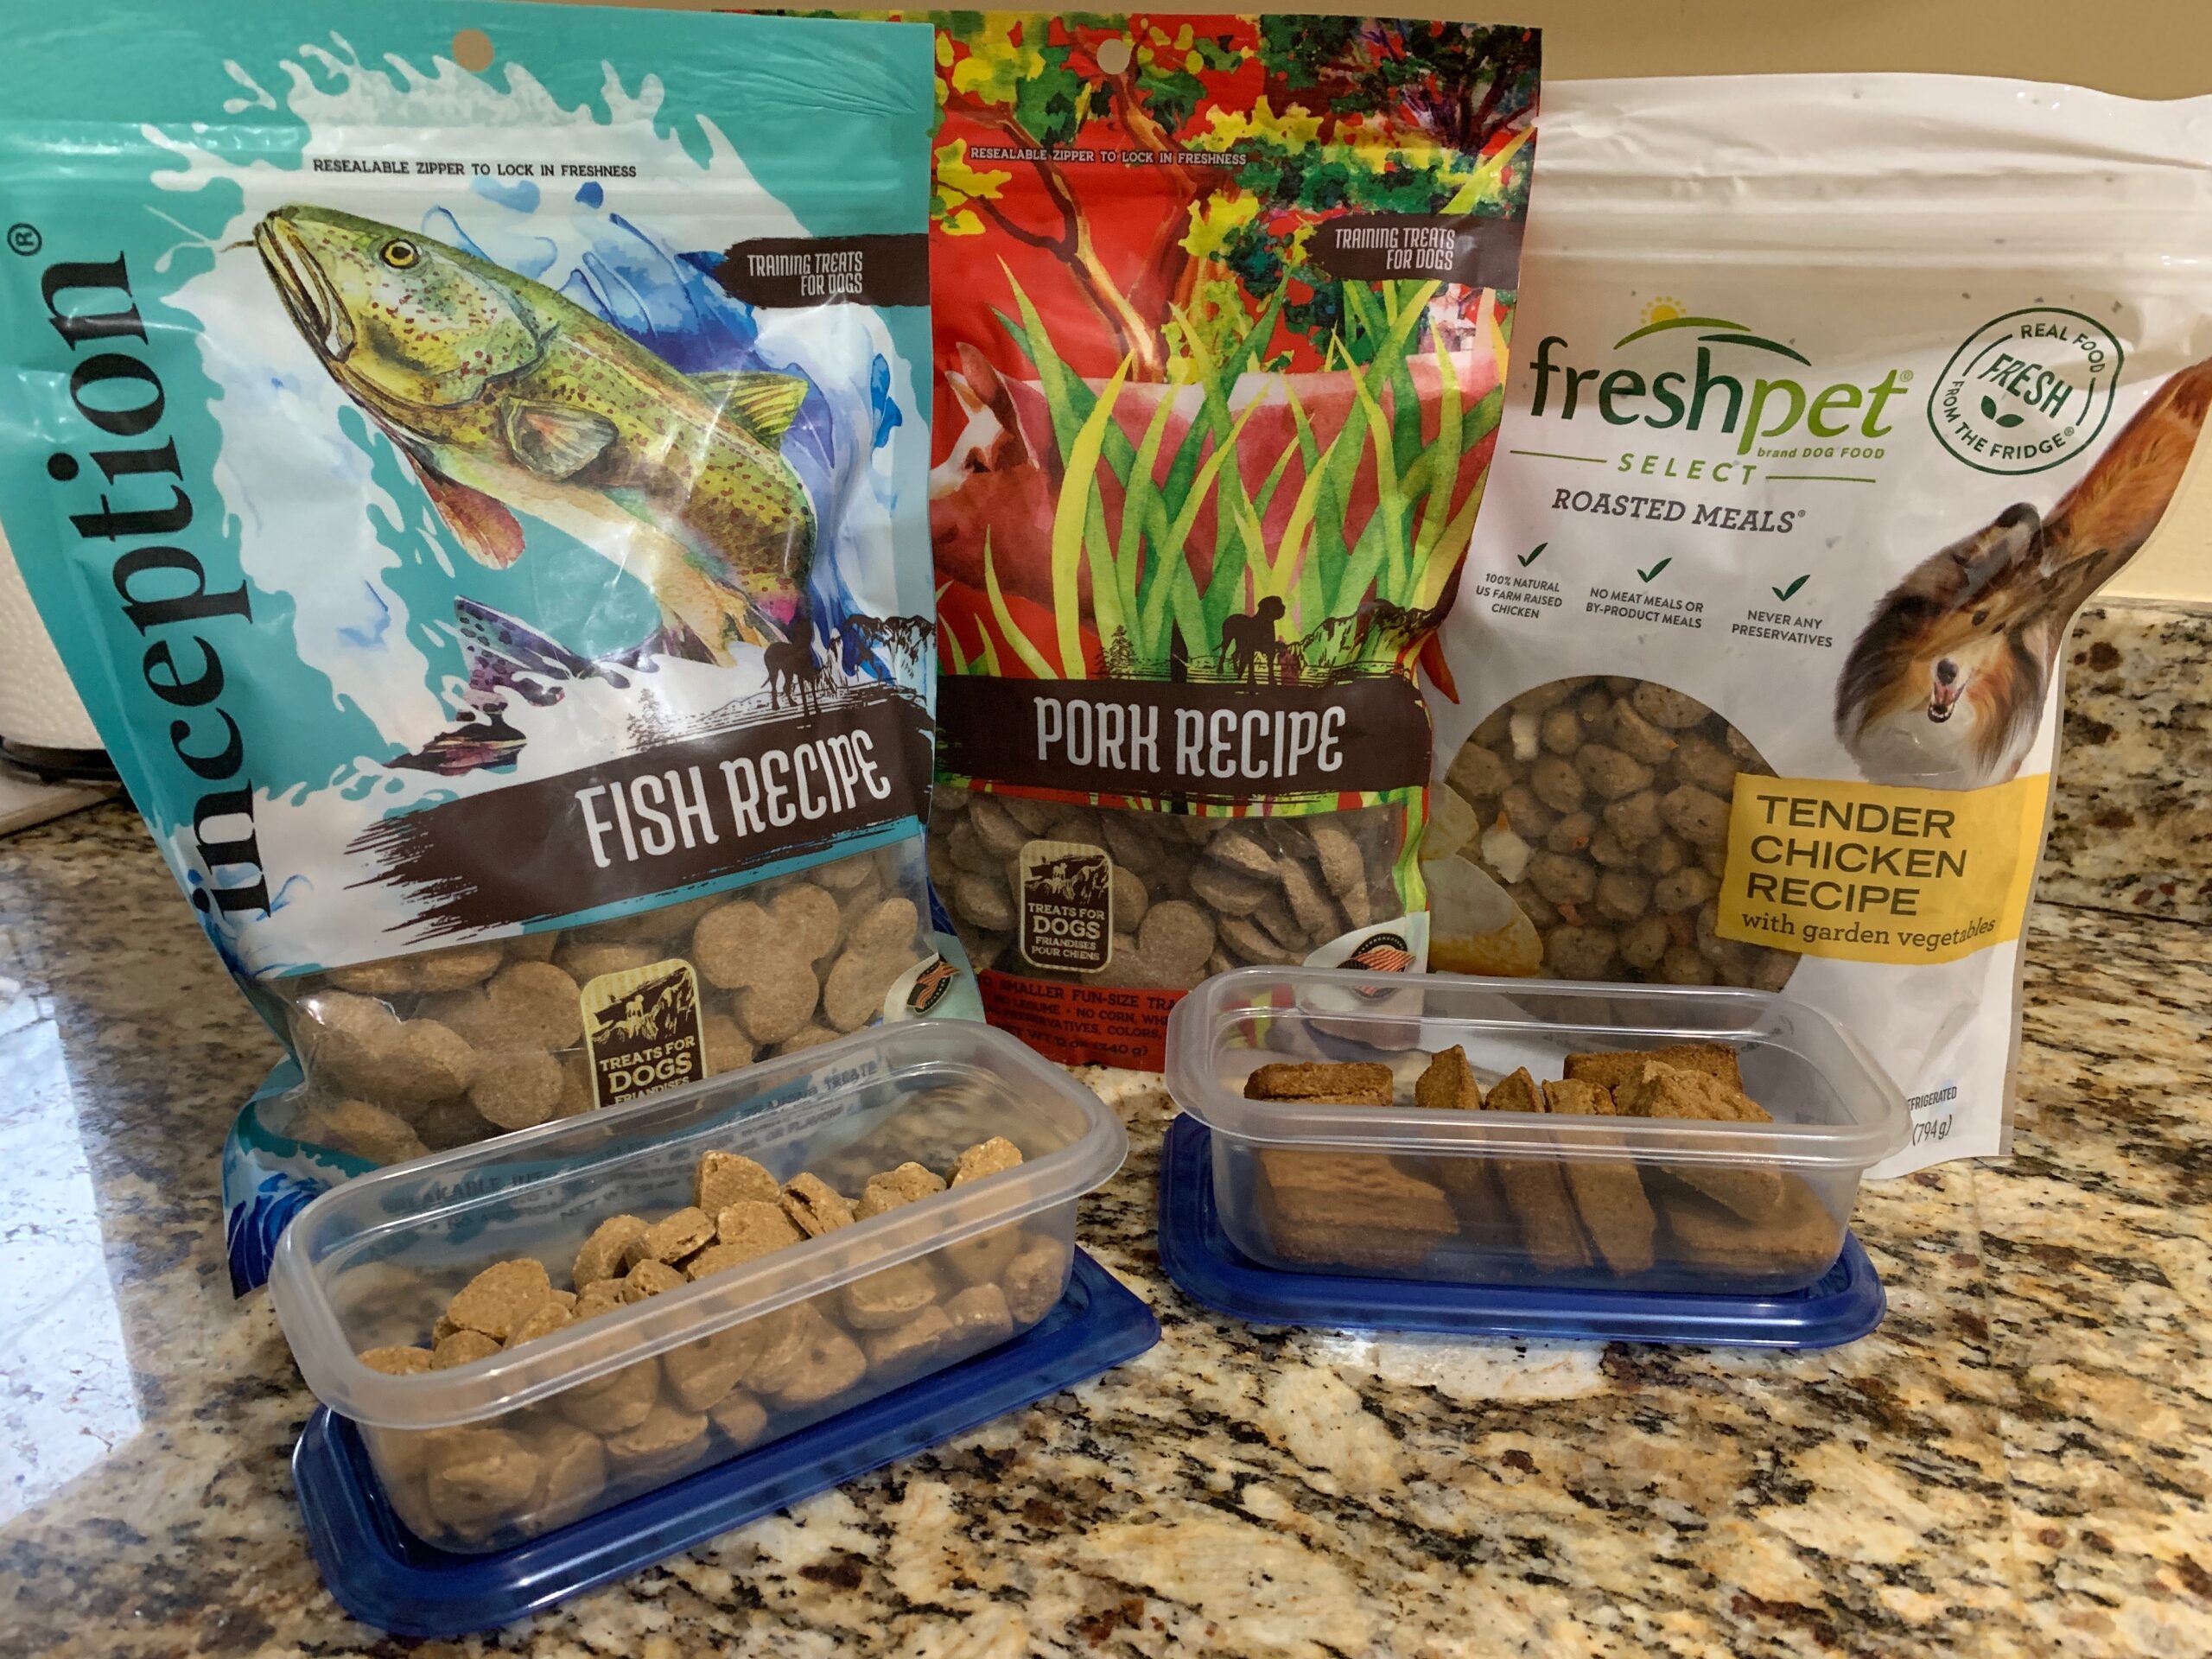
I also purchased a few slow feeders to make meal time a bit more challenging. Their favorite – by far – is the snuffle mat. There are lots of these available in different sizes; however, they can frustrate my dogs more than entertain. Rolling their kibble into a small towel or scattering treats around a small area or in their crate worked just as well. Another favorite is the treat ball that’s actually an egg shape! The AIBOONDEE treat ball has amused both Zabu and Bazinga for months now.

Enrichment is not simply Entertainment

We have incorporated a few of the author’s ideas, and believe that this book should be a best seller for dog owners. We have been recommending it to everyone! However, with agility dogs in particular, the dog-handler relationship is well developed from consistent training. Enrichment for these dogs requires more interactions with the handler than toys and solo games. I work hard to develop and maintain a strong relationship with every one of the dogs. Spending quality time with my dogs takes work, but is well worth the investment. Enrichment is more than just keeping your dog busy!

Interactions outside of agility improve our relationship with our teammates. We define enriching interactions as being engaged with each other in a stress-free activity. Walks, trick training, toy games, nosework, snuggles-n-cuddles and many other daily interactions can be embedded into each day. Even Kenzie, my 13 year old border collie, wants to learn new tricks, go new places to hike, and play with me. Many solo enrichment activities lack the interactions that benefits a dog’s social and emotional wellbeing. We’ve found that using enrichment toys or games is best balanced with quality time and interactive activities. We aren’t looking to simply entertain our dogs; we are looking to improve their overall well being and our bond with our four legged teammates.

Dog Training Team

Cue, Behavior, Reward, Repeat.

You already know before you instructor says it,
“You need to work on _______.” 

Fill in the blank with any number of maintenance training issues from broken start-lines to popped weave poles.

Maintenance Training

Is for simple handling or obstacle issues that might cost you the Q or prevent you from training more challenging courses.

A common one is the dog walk-tunnel discrimination, which if you’ve trained recently, your dog listens for the cue/line correction on approach. But, if the discrimination has not been in practice, your dog may just barrel along on the current line without an ear twitch in your direction.

With young dogs these issues occur often as you two learn to communicate on course, but they happen also with more experienced dogs. For whatever reason, when a chronic obstacle or handling issue surfaces we have a “work on it” item.

Maintenance Issues

These are NOT training issues on your Magic 5 list, for which you build a complete training plan with multiple sessions over weeks or months to learn new skills or re-train behaviors.

These are obstacles, handling or developmental issues related to existing behaviors that have deteriorated or become unreliable. There are a few reasons a maintenance issues may appear.

A dog’s response to a cue can weaken from lack of reward or from handlers accepting variable criteria, which we all know happens too often in trial environments. 

For example, after weeks of trialing with no rewards a once reliable “three jump lead out” kind of dog may break their stay before their owner can get past jump one. The dog isn’t being “naughty”; they need increased rewards for the correct criteria.

A soft spot or weakness can also happen from lack of use like the dog walk/tunnel discrimination or even overuse.

A good example of overuse is handling to the off-side entry to a C-tunnel. If you pull frequently to the off-side entry, then your dog may actually refuse a straight tunnel cue or just take the off-course assuming all C-tunnels are off-side entries. Dogs do learn obstacle patterns and then may ignore handling cues.

Planning for Maintenance

This past weekend I found a weak spot, a way too wide turn, while running an AKC master jumpers course with my young sheltie, Zabu. If the dog turned tight out of the C-tunnel, then the dog’s line was set to jump 5 (green path). If the dog turned wide, there were two problems: a back jump over jump 3 OR a zig-zag line to jump 5 which often caused the bar to come down.

My older dog turn tight on cue, but Zabu swung wide out of the tunnel despite my verbal cue. A weak spot like this doesn’t require a full 6 week training plan. It just needs to be “worked on”,  but how exactly does that happen? 

With maintenance issues, I am not doing a retrain or developing a new skill. I am reinforcing an existing skill. It is important to know and separate the two. However, I still take time to go back through the skill’s development. This helps me stay consistent in my training process.

To break this down, I look at the following: 

The cue I use needs to be consistent. For a tight tunnel turn, I use a simple verbal “Tunnel Come” which tells my dogs to turn tight. Whereas “Tun Tun Tun” tells them to go forward after a tunnel. Cue timing matters; my dog needs time to process my cue and initiate the desired behavior.

The behavior I want is a very tight turn out of the tunnel which means he looks for me immediately, rather than taking a stride forward before turning. So, I will click/mark only those turns where I see my dog’s eyes looking for me as he exits the tunnel. This reinforces his first stride after the tunnel is an efficient turn.

The reward will be on the tight line and will vary between a baited target and a tossed toy. 

A fundamental rule in animal training = rewarded behaviors get repeat. With a behavior that needs maintenance, I plan three training sessions with three different objectives to reinforce the behavior. 

Session #1 – isolate the behavior

Session #2 – put the behavior in a simple sequence

Session #3 – do a harder sequence that allows generalization and comparison to an alternative behavior.

Each session will have 3-5 reps.

I only progress to the next session if the dog has a high success rate, particularly on the first few repetitions. If the behavior is consistent only at the end of the session, then the weak behavior needs to repeat that session.

Only if your dog is successful does an increased frequency of rewards improve your dog’s competence and confidence in completing the cued behavior. Trust me, it’s worth spending the extra time and treats reinforcing the criteria you want to see on course.

I also pay attention to other factors that can impact my dog’s ability to complete the cued behavior.

For example, my dog might perform a behavior better on my left side or right side. The environment can also influence my dog’s performance; including distractions, the footing and equipment. To help, training sessions should be in various locations and spread out over a week or two.

With continued training my dog should have an improved understanding of the cue and behavior. Their success rate when completing the behavior should be between 90-100%.

More Training Tips

With your own training field maintenance training is easy. But, too often handlers are using course layouts in a rented space or can only train in a weekly class. To avoid just randomly throwing in a reward during “training” without having an exact plan, I have two suggestions.

1. Do your maintenance as a warm-up.

This is easy to do with tunnel issues,  contact criteria or when shoring up your dog’s response to a handling cue. In a warm-up situation, you can focus easily on one simple cue-behavior-reward pattern and can get multiple repetitions done quickly. 

2. Ask your instructor to help.

This is your training time, and most instructors are glad to help you train something specific, particularly if they asked you to “work on it”! Ask them to help you with your maintenance issues.

For example, instead of running the full course, ask to run a smaller section to allow you to reward where needed. You could quietly ask for an alternate path for your dog for one turn. You might also ask for an extra minute or two at the end of a class for a few minutes of  training time on a maintenance issue. You are training a simple behavior just a few good rewards will benefit your dog.

Dog Training Team

Reward Your Dog Better.

Dogs have preferences for food just like people! While true that some dogs will happily work for anything, most dogs have a favorite food. However, this preference may change week to week. Dogs know what is a “normal” treat and what is a “special” treat! While a dog may work for a normal treat, we may be missing the benefit of a special treat! When we communicate with rewards, we might not be communicating what we think we are or as well as we could with a different reward.

What Makes a Treat Special?

We have always encourage our students to bring multiple types of treats to a training session. Whether that’s homemade salmon cookies, roasted chicken, or the stinkiest treats money can buy, the more treat option you have the better. Most of our students know what treat is enough to keep their dogs’ attention. And, they know what treat makes their dog highly motivated to work. That second type of treat is worth it’s weight in training gold; we want to know what will kick our dog’s motivation into the next gear. Generic kibble might get your dog to cooperate, but using a treat that is new, stinky and desirable can keep your dog engaged. It’s a standing joke that whatever is in Diane’s pocket is of the highest value! Someone else’s cookies are almost always better after all.

As a matter of fact, t’s not just dog’s that have favorite treats…check out this Ted Talk excerpt with Dr. Frans de Waal which demonstrates reward preference and an example of a “higher value” rewards.

Explore Your Dog’s Treat Options

The underlying principle to shaping is there is a desire to earn the reward; so as trainers, it’s our job to motivate our canine partner with a desired reward! We recommend exploring your dog’s treat preferences to maximize the benefits of a reward. While two treat options is good, with a little bit of extra work we can have multiple treats available for our dogs to choose from. It’s an easy, fun way to engage our dog’s in their own development. You’ll never know when a novel reward might lead to a training break through, and we know having more options for rewards improves your training session quality.

Try it out and let us know what you discover about your pup!

Dog Training Team

For the Love of the Game

It’s heartbreaking to see your teammate stressed out, disconnected or shutdown mid-run. I’ve seen it happen with my own dogs and students’ dogs too. We want our dogs to love playing agility with us. This game is supposed to be fun for both of us. But, stress happens. Whether a team is training through chronic ring stress or a dog is suddenly insecure or unsure on course, there are many strategies we can use to support them. Being able to boost your dog’s confidence and help them cope with stress should be something every handler can do for their dog. So, here’s what I tell my students to do and how I set my own dogs up for success in even the most demanding trial environments.

Learn About Your Dog
Ask yourself when your dog loses confidence and struggles to focus on course. This is different for every dog, but there are a few common factors that contribute to ring stress. Possible factors range from your relationship with your teammate to the color of the judge’s mask. We’ll take a look at three common factors that are easy to recreate in training.

This starts off with the environment. The uncertainty of being in a new space around new dogs, smells and noises can create anxiety that shows up as our typical ring stress behaviors. My first suggestion for this is allowing time for your dog to sniff and explore the trial site. This is not an instantaneous fix. But, allowing your dog to become familiarized and comfortable in new environments can help them be more adaptable to new environments in the future. If your dog is fixated on the ring or nervous of certain areas move to a distance where they can focus on cues and physically relax. I recommend repeating this throughout the day to allow your dog multiple opportunities to understand their surroundings.

People are another factor I often see impacting a dog’s ability to stay connected on course. This can be people in or around the ring. The number of people and the proximity of a specific person, like ring crew, to your dog might impact their stress level and distractibility. If your dog always trains alone or with just one instructor in the practice field, stepping into a ring with half a dozen strangers might throw them off their game. A judge that follows your dog closely in the weaves or a crowd of people behind your dog on the start line can take up attention and energy that your dog needs to do agility . To help we can start including more people, new people and people in odd places when practicing. Our objective is not to overwhelm our dog, but to successfully complete a sequence or obstacle while a person is acting as a distraction.  At first, a person standing on the other side of the room might be distracting enough.  As your dog succeeds, you can begin adding multiple people and people in motion around the practice ring.

We often see ring stress occur before or during complicated obstacles, like weaves or the contacts, or during complex sequences. This is because these complex tasks require more concentration from the dog than they have to offer when over stressed. This type of issue is separate from obstacle specific issues; just because the stress appears before the weaves does not mean the weaves are the cause of the stress. For example, your dog pops the poles when the weaves are on the edge of the ring. The pop was due to a dog outside the ring walking by, but handlers will often focus their training solely on the obstacle. Believing their dog has poor weave poles, the handler never practices with moving spectators or distractor dogs. The popping issue persists. This is where failing to help our dogs appropriately cope with ring stress can intensify an obstacle specific issue. A dog that is continuously corrected for popping or continues to fail in the ring might develop stress specific to the weaves. Now, this is the exact spiral I want to prevent my students and all agility teams from experiencing. So, here’s what we do.  

We keep training and reinforcing your dog’s agility skills beyond what you’ll need in a trial. An increase in ability and consistently rewarding criteria can increase your dog’s competence with a specific task and boost their confidence in the ring. This type of progress takes time, and we can support our dogs by keeping it simple and keeping them successful in the ring. Skip the challenges you know they can’t do, we don’t want to set our dogs up for failure.  Don’t try to fix mistakes over and over, if your dog is distracted and stressed the best thing you can do is keep moving and find an obstacle they can complete successfully! If you are looking to train a certain issue, like avoiding an obstacle or start lines, in the ring you better be prepared to reward big. Choose your dog’s favorite toy and opt for FEO (For Exhibition Only) or NFC (Not For Competition) at your next trial. If your dog succeeds, party like 2020 is finally over. If your dog doesn’t succeed, find an obstacle or behavior that they can succeed at. Then, you guessed it, party.

Note: I don’t recommend parties for dogs with over arousal issues. Flash, a rehabilitated(ish) arousal junky, gets pets and quiet praise as a reward. Once she’s relaxed, we release her extra energy with tugging.  Arousal issues in agility really are their own topic for another day.

If you can recreate these confidence issues easily in practice, you may want to discontinue trialing for a period of time to stay in a more controllable environment. We want to practice agility in environments where our dog can still be successful.

Sniff Worries Away
No more “No, sniff!”. Sniffing is one of the main ways our dog’s gain information about their environment. If your dog is stressed due to noise, people, other dogs or whatever else, correcting and preventing sniffing can further increase their anxiety. Nothing makes stress more stressful than adding uncertainty to the situation. Sniffing provides our dog’s with useful information and can make an environment feel more familiar. Our goal shouldn’t be to eliminate sniffing, rather give your dog adequate time for sniffing before you need them to focus on agility.

Take time to let your dog explore and sniff their way around the trial site. You can even encourage sniffing by putting it on a verbal cue, we say “Go Sniff, Sniff”, or doing a small treat scatter (far, far away from the ring). The scents around the ring are similar to what smells will be on the agility course too.  This helps desensitize our dogs to smells in the environment that might be distracting upon first sniff, sniff.

Build a Connection Behavior
What will you do if everything goes wrong? Your dog yawns on the start line or starts sniffing at the weaves and you need a way to reconnect with them. Asking them to “Come” or calling their name doesn’t create enough motivation or instruction for your dog to re-engage with you. Typically, this is because verbal cues like “Come” and “Fido” lack specific criteria and the strong reward history we need. We might say our dog’s names three dozen times a day with no reward or purpose. When we get to the trial, our dogs simply don’t understand the behavior you expect when calling their name. Instead we need to choose and use cues that are specific, easy and always rewarded. These should be behaviors that are enjoyable for our dogs. Using a hand touch, spin, or asking for your dog’s favorite trick can give your dog an easy win and help them re-engage with the game of agility.

Here’s the deal – you need to practice using your connection cue. Whether you’re at agility class or at home, whenever your dog makes a mistake or disconnects use your connection cue and reward it. Jackpot it, have a party about it. Use the best cookies and their favorite toy. Work your tail off to make this connection behavior an utter joy for your dog to complete.  This is the only way for a connection cue to make a meaningful difference in a trial environment. Quite simply, you gotta train it if you wanna use it!

Be a Proactive Handler
When you know you’re going to encounter a distraction, craft your handling plan to support your dog best throughout the run. This is different for every team – here are some examples of proactive handling might help you and your dog.

1) You may find staying closer to your dog boosts their confidence. You can choose to avoid long lead outs and distance on course. You can also use yourself as a buffer between your dog and a distraction. If the weaves are along the fence with teams waiting to run, pick a handling plan that puts you between the weaves and the fence. You’ll add support by being close to your dog and provide a visual barrier between your dog and the other teams watching.

2) Change how you use your voice on course. Mostly, this means managing your tone. High pitched or squeaky noises from you can trigger anxiety in your dog. Yes, they can hear the panic in your voice. To help, keep your voice deep and clear. You can also increase verbal support by using clear reward markers, like “Good” and “Yes”, throughout your run. However, we do want to avoid useless chatter, “Good dog, let’s go, hurry. Okay, Fido, here we go, tunnel.” Adding extra words without intention can distract your dog from information they actually need, like what obstacle to take next!

3) Plan to use your connect cue before your dog disconnects. If your dog consistently runs around the weaves on the first attempt, as you approach the weaves you should use your connection cue to keep them on task. While this might not guarantee a perfect set of poles, you’ll start to interrupt the run-by behavior. A connection cue with strong reward history (i.e. always rewarded) should help you alter your dog’s association with the weaves and give your dog the best chance at success in the ring.

To those of you on this training journey, it’s a process. It will take time. You will make a mistake, or two, or three. Please, be gracious with yourself and your dog. In the end you’ll be a better dog trainer and you’ll strengthen your relationship with your dog. We can teach them how to love this sport as much as we do.

Team

Jumpers Run Review

This past Saturday, Zabu and I ran an AKC Ex/Master Jumpers course judged and designed by Mark Upshaw. We were outdoors on grass, which was soggy from two days of continuous rain. The course was built a bit differently than the map due to footing which also had a few dips and inclines. It was, however, a lovely course with lots of handling options and big spaces between jumps.

Throughout this article, I’ll be breaking down how I analyzed my handling choices before and after my run on this course! I always start by identifying my goal for the event and our current training issues, we call these The Magic 5. Then, I can decide on handling in my Pre-Run Analysis and review our performance with a Post-Run Analysis.

In our methodology, local trails are an extension of training, not the end goal; so I go into every trial looking for training opportunities. Zabu’s “Magic 5” were in my mind as I reviewed each course map. Her primary training issues this month are (1) lacking consistency on her seesaw performance from training to trialing, (2) understanding blind crosses and (3) tighter wraps with me in different positions. For a masters level AKC course, I was primarily looking to test and use some of our blind cross training.

Pre-Run Analysis

My walk-thru process is…

1 – Walk the Dog’s Path
This let’s me look for soft spots, dips or other obstructions on my dog’s path I can see potential off courses from the dog’s perspective, and this will help me memorize my handling plan later on.

2 – Consider handling options
Do I use mostly Rear Crosses (RC) which worked well for the 12″ dogs OR do I use mostly Blind Crosses (BC) which is what Zabu has been training the past month?

I chose BCs – though the riskier choice – it is what Zabu has been training.

3 – Plan Out Handling & Cues
Now, I can decide on the specifics of my cues and walk my handling plan for entire course. This means plotting out distances, adding verbal cues for support and imagining the timing of my crosses.

The Plan
Send “Out!” to jump 2. Run ahead to BC between jumps 3-4. Send “Out!” to jump 5, then run ahead to BC between jumps 6-7. Send “Out!” to jump 9, and BC between jump 10 and the weave poles. Send “Out!” to jump 13. Run ahead for BC between jumps 14-15.

Intended Handling Plan

5 – Film My Run!
Find friend to video run. I am hoping to see how my current training criteria holds up in a competition. I definitely want our run on film to review both my performance and Zabu’s.

Post Run Review

My post-run analysis is to look for miscommunication between Zabu & I and, at each point, decide whether the problem occurred due to my “plan” or the “performance”. Not only do I think back on how the run felt, I watch my film to analyze our teamwork throughout the run.

Zabu – Video of Course Run

The Plan In Review
The send “Out!” to jump 2 worked well, I got ahead to my BC easily. The BC between jumps 3-4 didn’t work; the plan felt good, but Zabu did not connect with me on the new side. Due to this bobble, we skipped our send “Out!” to jump 5 and then the BC between jumps 6-7. However, we got back on the plan by jump 9 for our Send “Out!”. The BC between jump 10 and the weave poles worked, but created too much speed for her weave entry. With Zabu being young, a rear cross may have given her more time to see and collect for her weave entry. I sent “Out!” to jump 13, but I was late on the execution for the BC between jumps 14-15. On second thought, a Front Cross (FC) might have worked better to set up the turn to the end line.

Revised Handling Plan

My take-aways for future training and trialing:

 1 – On film, it looks like Zabu is chasing my right foot/leg for the first BC. This is a “game” we play; to fix this I need to stop letting her tug on my pants/shoes.

 2 – I need to remember that with more trial experience she has picked up considerable speed so a FC or RC will be better choices to control lines where she needs a collection stride.

 3 – On video, I obviously slow up at jump 18. It did not affect her run, but it’s a bad habit of mine!

With this review I not only understand why faults may have occurred, I also have actionable solutions for future handling plans. I can continue working on our main training issues, while being more conscious of how to best support Zabu’s performance on course.

Team

What I know about Recovery

S’more lost her nail last Monday.

Once we had a game plan for helping S’more’s nail grow back, I shifted my focus to the other ouches. Ripping off a nail probably requires a good deal of force, meaning she yanked her whole front, left leg pretty hard. And, sure enough, her shoulder, bicep and chest were giving off heat. I do know this means more blood flow being directed to those muscles to help repair damaged tissue. I don’t know the specific muscles, tendons or ligaments that would have been impacted by such a yank. I also don’t know what direction she yanked. Pulling the leg back or yanking away while the leg is in front; these different positions change how the muscles and connective tissues were impacted.

Long story short, I don’t know how she did it or when she did it. I know two things: 1) that probably hurt and still hurts & 2) we’re now in recovery mode.

Now, it’s important to note that at no point did S’more limp and she was not in excessive pain. If so, we would have taken additional steps to see if there was any damage to the bones or tendons above the nail.

When we encounter a minor injury, like a ripped pad, broken nail or are really sore – like after a big weekend of hiking, our dog’s need extra recovery time. But, recovery doesn’t just take time. I do my best to use that time intentionally to help my dogs (or, myself) heal properly and regain normal functioning. The following activities are what I have been including to help S’more recover and get back to agility. Every injury is unique; the structure of the dog, the accident, the chronic wear n’ tear, and so, so many other factors come into play. These are the general guidelines I follow for my own dog’s recovery and, to some extent, my own recovery as an athlete.  I am always learning more, reflecting on past mistakes and trying to do my best. If you need help with your own dog or want to learn more, I encourage you to work with a physical therapist or veterinarian that specializes in dog sports and sports rehabilitation.

Recovery Guidelines

1. I don’t ice.

Ice restricts blood flow from reaching damaged tissue. Blood flow brings in necessary materials for repairing damaged tissue and takes away by products of the recovery process. Icing can kill red blood cells as they arrive and those damaged cells pool in the injured area. This can increase the time to recovery. I would only ice under special circumstances when prescribed by an expert that specializes in dog sports rehabilitation.

2. I use active recovery methods.

Active recovery means using movement to encourage blood flow to and through damaged tissues. Typically for my dogs this includes active stretching (i.e. dog moves themselves into different stretch positions) and walking. For people, light strength training, biking and swimming can also be great choices. These are a bit harder for a dog and we need to manage the dog’s intensity. Active recovery activities should be low intensity; no fetch, no spinning quickly, no jumping, no landing, no sprinting, and no pulling.

I keep all our activities low intensity until our initial injury is healed.
For example: A lose leash walk is a very different physical stimulus than pulling the owner down the street or breaking into a run. Pulling in particular should be avoided – always. Not only is your dog likely pulling significantly more than their body weight, they’re likely pulling from a non-advantageous position depending on your collar or harness choice. Overtime, this can add strain to already sore and damaged muscles and cause muscular imbalances.  I always bring treats on walks to encourage my dogs to keep a loose leash, and reward my dogs for continuing forward rather than tugging them forward. With lots of squirrels in the neighborhood and a bored border collie, this is a challenge. But, it is worth every cookie to keep S’more walking calmly and at an appropriate pace.

I incorporate active stretching multiple times a day during recovery. Using treats I ask my dog to move into different positions to extend and stretch certain muscles. Overtime, active stretching can increase mobility – the ability of my dog’s joints to move through a full range of motion. This involves moving slowly into different positions relying on the body’s ability to move safely into a position. This means the dog is actively using muscles to stay balanced and maintain coordination while expressing flexibility. This can help increase range of motion and prepare the body to use those muscles and joints in activity.
Yes – I do active stretching before agility for myself and my dog.

3. I use passive recovery methods.

Passive recovery means an outside force (aka: you or another human) are manipulating the dog’s body. This can be massage or stretching which also brings blood flow to and through the damaged tissue. 

When I massage my dogs I use a very light pressure on their muscles and watch for signs of distress (i.e. fussing, licking or staring at me). I try my best to massage in the direction of the muscle fibers – you wouldn’t massage your calf muscle left to right, you massage up and down. Also, I never “dig in” with my fingers.

When I passive stretch my dogs I use a very light pressure to move their limbs and watch for signs of distress (i.e. fussing, pulling the leg away or staring at me). My objective is to work my dogs’ legs through their current range of motion. This means moving into extension, flexion, abduction and adduction for different muscles. I focus on the shoulder joint and hips; which involves dozens of muscles moving into all these positions.

This may not always be what you consider as “full” range of motion – if injured or tight, your dog’s tissues may not stretch to their normal abilities. Just like my ability to touch the floor often depends on the tightness of my hamstring muscles. Someone else forcing my body into over extension or flexion risks tearing or straining the tissues around my hip joint – not good for humans or dogs. Moving the leg into a position that my dog is comfortable with is the goal during passive stretching. This can sometimes be a farther range of motion than they can reach on their own with self stretching. Overtime, I can increase and/or maintain flexibility of my dog’s muscles and connective tissue.

I do not use passive stretching before activity or agility – but I do use passive stretching directly after exercise and always after an agility day. After massage or passive stretching, I always offer my dogs lots of water or give them a hydrating snack (like watermelon). Extra fluids will help their body process any of the damaged cells that are moving away from injured areas.

4. I look for indications of improved well-being.

This might include self stretching through improved range of motion, relaxing during massage or passive stretching, or more mobility in active stretches. While I wait for the nail to grow back, I also want to see some of the additional soreness or tightness to dissipate. This took approximately 7-8 days for S’more. If I don’t think it was “that bad” or that she wasn’t in “that much pain”, why would it take over a week for her to feel better?

5. I recognize that compensation and in-activity lengthen recovery time.

Compensation means your dog is putting more load on other muscles to complete activities, like shifting your weight from one leg to the other when standing. This is fairly clear when your dog is limping; the uninjured legs are doing WAY more work and these dysfunctional movement patterns are costly. So, when I put a sock on S’mores foot I am forcing her to compensate because socks are evil and she doesn’t walk normally. While this is necessary to keep her toe clean, it also means I need to limit her activity as much as possible. The same goes for a cone or other instruments you’re attaching to the dog to aid in the healing process. If it changes how your dog holds their head or moves their legs you’re likely going to see additional soreness in places other than the initial injury site due to compensation.

To minimize in-activity I focus on activities throughout the day that drive blood flow to the injured area – like the passive and active recovery methods mentioned above.

6. I spend equal amount of time recovering as I do coming back to sport.

 For S’more, I anticipate we’ll have a full nail by the end of the week. That’s about 15 days in recovery, and we’ll spend 15 days coming back to agility. This means that she will not be on full height equipment or running courses until then. For now, we’ll keep “agility sessions” short focusing mostly on foundational movements; working technique at a slow speed and no jumping. I’ll be spending time passively stretching and massaging her foot to help any muscles or connective tissue that were impacted by the nail being ripped or yanked off.  And we’ll be focusing on mobility (using active stretches) and strength training (using our core work exercise – you can find experts for that too!) to get back to agility safely.

I know that S’more has not lost her ability to do agility. She is plenty fit, and two weeks of rest doesn’t deteriorate that much muscle. But, gradually coming back to sport decreases the likelihood of reinjuring the toe or another part of her body.

For major injuries, surgery or a longer break from agility, more time is needed to bring the dog back to sport safely.

Now, here’s the real secret. These recovery techniques aren’t just for recovering from minor or major injuries. Using recovery techniques every day can help your dog improve their fitness, reduce risk of future injury and may increase their longevity in the sport.

Dog Training Team

Training Principles for Success

I believe that how you train is just as, if not more, important than what you train. How we communicate, support and reward our dogs throughout a training session has an impact on what our dogs learn and how they perform. These are the three principles I follow in my own training to ensure I create a positive learning environment for my dogs.

Always Train in a Good Mood
Your dog is going to need your full support on course to understand their job, and if your dog is still in training your support is critical for their success. Coming to a training session in a bad mood or training while distracted by other problems does your dog a disservice. You should always bring your best self to training; and I know, this can be easier said than done.  Taking a moment to clear your head, plan and set expectations for an upcoming training session is a good step to set yourself and your dog up for success.

Never Fail More Than Twice
When challenging a concept I want to see my dog make mistakes and think through each new challenge. This is how their understanding of a behavior grows. However, I do not want to see my dog frustrated or discouraged. Failing over and over again does just that for most dogs. After the second failure of a skill, I always add more support (e.g., moving closer during a distance drill, luring with your hand, slowing down) and reduce the difficulty back to our last successful attempt.

End with Playtime
Dogs have been shown to retain information better from training sessions when they also engage in a short play session (approx: 5 minutes). This is a bonus for training new skills, and there are huge benefits for our team development. Through play you can learn more about your dog. Consider what toys they like, what noises they find funny or scary, and how they reaction to motion? All of this information will be important throughout your agility career. We’ll gain useful insights about how to better communicate and support our dogs on and off the course from engaging in thoughtful play. We are also reinforcing ourselves to keep training sessions positive and fun; remember we always train in a good mood.

Dog Training Team

Jumping Into Plyometrics

My goal for agility is to train to a competitive level while minimizing the number of injuries my dog sustains throughout their career. This year I retire my 10 year old, former world team dog and simultaneously have begun training my 18 month old in agility. Whimzy had a highly competitive career at 16” and never had a major injury. Competing a dog often over multiple years and staying healthy can be quite the challenge as agility is a high impact sport. Our dogs run hard and their bodies absorb a lot of impact on landing. By incorporating core workouts and cross-training, like hiking, we can increase our dog’s overall fitness and reduce their risk for injury. Handlers around the world have embraced the concept of additional fitness training for our canine athletes. But, this isn’t the only fitness concept we should be bringing into our agility training. What we train, how much we train and how often we train has a direct impact on our dog’s overall health and performance in agility. It is up to us, the handlers and trainers, to structure training sessions that positively benefit our dog’s health and subsequently improve our dog’s performance in agility. The following article outlines what I consider when planning for agility training and recovery. 

Jumping qualifies as a plyometric movement; this means it relies on generating a large amount of force in a short period of time. Within the realm of agility, these plyometric movements (i.e. jumping and contacts) require landing from a height which places a large eccentric strain on the dog’s muscles. Eccentric contractions cause more damage to the muscle than concentric contractions. Absorbing a large amount of force repeatedly within a training session causes significant damage to the dog’s muscles; more so than running, turning or weaving. These activities require less force to be produced by the muscles than jumping, which allows for a quicker recovery period. Now, let’s be clear. Muscle damage is necessary to produce muscle growth. Muscle damage does not result in injury unless we do too much of a movement too often. To regulate the amount of damage to the dog’s muscle fibers caused by plyometric movements, I track the volume and frequency of plyometric movements throughout our training week. 

When tracking volume for walking, we count miles. For plyometric we count the number of times the dog is required to land. For example, Flash, a novice dog, takes about 36 jumps per training session. When tracking volume we need to understand the minimum effective volumes and maximum recoverable volumes of a training session. In other words, a minimum number of jumps to stimulate a performance increase and a maximum number of jumps before overtraining occurs. The 36 jumps Flash does in practice meets the minimum amount of volume required as it closely represents the number of jumps Flash will see in competition. This stimulates a positive adaptation while not drastically exceeding the number of jumps required for competition that would result in overtraining. While 36 is not the magic number, we need to be intentional about how many jumps or repetitions over the contacts, particularly the teeter and a frame, our dog completes during training. 

Not only do we want to be mindful of the volume of plyometric movements within a single training session, we need to consider how often we train these movements. Due to the high amount of muscle damage that is caused by training plyometric movements our dogs need an adequate amount of rest before we train again. When we train our dogs their performance eventually decreases throughout the training session, we see this when our dogs get fatigued, slow down or make more mistakes than usual. With time for recovery they can train at the same level before that initial performance decrease. For example, at a show your dog may have three runs throughout the day. With a few hours of rest in between runs your dog can run at the same speed and perform just as well in the last run as in the first run. 

With time for recovery and time for adaptation, our dogs can train at a higher performance level than before. This is where we see technique, power and speed improve. To get these performance increases our dogs need longer than a few hours of recovery in between plyometric movements. Deciding how much recovery time is needed for your dog’s body to develop positive physical adaptations depends on how much volume, aka: how many jumps or contact repetitions, happened within the training session. For example, if Flash did 20 jumps – a low volume for what she is accustomed to and a low volume for what competition requires – a shorter recovery time, like 24 hours, would be appropriate. A larger training session, say 80 jumps or more,  might require 36 hours up to multiple days for recovery. This depends on your dog’s fitness level, what volumes your dog is used to, and the purpose of your training session. 

The volume and required recovery time help us determine how frequently we should train to best meet our dog’s physical needs. Training sessions with high jumping volume should be less frequent, while low jumping volume training sessions can happen more often. Training sessions without jumping or contacts, such as rewarding weave pole entries, flat work drills or other non-plyometric movements, can happen often due to the low recovery time required and can be used in between plyometric training sessions. Just as you tailor your training methods and handling style to meet your dog’s needs; how much and how often you train should be determined by what provides the best physical stimulus for your dog to stay healthy and perform better in agility.

Dog Training Team

Magic 5: Training Priorities

We all want to accomplish our dream, whether it is earning a prestigious championship, attaining optimal health or buying a beach home in Hawaii – we all have dreams! Arriving at success, however, is so much easier said than done. Keeping our sights set high is motivating, but we can easily loop through old habits, go sideways onto different challenges, or just take a few too many detours away from our dream. It’s identifying the small goals – what we do day-to-day – that ensures success. Unfortunately, we often see too many and cannot get a plan started.

We call our process for identifying priorities the “Magic 5”. 

Step One: Data Gathering

Before we can make an assessment of how to improve, we need to know what issues need improving. Think back to your last trials, what sequences or scenarios gave you and your dog trouble? Reviewing your results will give you a broad picture of the faults and issues that you may be struggling with in competition. You can also consider what issues or challenges you experienced during your last training session, class or seminar. Look critically at your performance in competition and practice.  

Step Two: Identify Common Problems

More than likely, you now have a dozen (or more) items on your list. You must review the data closely to identify the common problem areas. Look for errors that have happened more than once and be objective (take some of the emotion out of the review process). 

For example, if your dog broke his start line and you were eliminated at jump two, you may remember this all too well! However, it was one broken start line. If he self-releases off the a-frame every time there is a tunnel nearby, then contact training is a better item for your list. 

This type of analytical review also serves to bring clarity to the actual issue behind each fault. Many aspects in agility are layers of skills and decisions.

For example, a late front cross may truly be caused by the need to “babysit” your dog’s weave pole performance which means it isn’t a front cross issue; it’s a weave issue.

Understanding which skill or decision caused a fault is a big piece of accurately diagnosing what problems belong on your list. 

Step Three: Evaluate 

Write down all the faults and problem areas that have multiple occurrences. Analyze each issue with regards your goal and consider the return on training (ROT) value. We use this simple double-check to be sure that the time required to train the issue or skill is worthwhile in terms of your ultimate goal. Training new moves, harder courses, and advanced skills may be fun, but you do not want unnecessary skills at the top of your list.

To identify your Magic 5, you must honestly assess the ROT value of each issue and ask yourself how it will help you reach your current goal. This is where you find your Magic 5 training list. Other issues get temporarily put to the side.

Step Four: Dig Deeper

With your Magic 5 – the five issues you’ve deemed to be the best investment of time and resources for your team to work on – identified, you now want to consider your ability to improve on each issue in context to your KSA’s: knowledge, skills and abilities. Put each issue/problem into a category.

  • Training Knowledge – When looking at an issue/problem ask yourself … can I identify what steps I should take to train my dog to understand the issue? If you answer “No”, then you must seek out more information. Recycling old training methods and drills will not fix the issue. Find an expert, sign up for a seminar, consult with your trainer or buy an online resource to help you learn more about the issue you’re training. 
  • Dog Skills – When looking at the issue/problem ask yourself… does my dog have clear criteria for the skill? If you gave an honest “No”, then you need to think through all aspects of the training exercise. Write down your criteria for the skill, list what stressors might be affecting skill performance, and have a precise plan for where rewards will be given.
  • Handling Abilities – When looking at the issue/problem ask yourself … do I understand how to resolve the handling challenge? If you answer “No”, then you need a deeper analysis of your handling. Write down what handling maneuver is causing you issues and whether you can apply it in different sequences. This will give you a better context of which element of the handling move (application, timing or execution) is the source of the issue and what specifically to work on.  

Step Five: Sanity Check

Review your Magic 5 with your coach, training partner or trusted agility friend. A second set of eyes on your list can be invaluable before you invest time, money and resources.

Dog Training Team

4 Steps for Purposeful Practice

It’s not training quantity that produces success.
It is training quality. 

The question for us as trainers becomes, how do we create quality in our training sessions? 

We often get tricked into thinking that lots of practice hours are productive and will automatically produce results. After all, we’ve heard that practicing a skill for 10,000 hours is the pathway to mastery. Well, while skill repetition is an important part of dog training, once a team reaches a certain level of competency, repetition no longer yields the same value

On its own, repetition of what we already know will not lead to the improvement of a skill. The quality of practice becomes a critical component to forward progress. As we strive to achieve bigger and better goals, we need to increase the amount of intention we put into our training.

After years of trial and error, we have a four-step process to help us create a purposeful practice session every time. Each session includes a purpose, a challenge, boundaries, and a review of what was accomplished. 

1. Identify a Purpose 

Before a training session begins, we identify what should be trained. Without a purpose, the session may just be training. Determining your topic or what for a training session is the first key element in training for quality. 

Be specific. You can make it simple – write down a weak obstacle skill that you want to improve. If you’re running a practice course, are you running to push for speed, to test a new handling move or to run clean? Another example of purpose might be to improve the accuracy of your dog’s weave entry when coming from a tunnel.

2. Create the Challenge 

Once we have established what skill we are going to train, we create a short training set. The training session must focus on the skill and must contain a challenge. 

A challenge is a different or new situation that causes struggle or failure. This can be as simple as aiming to complete the skill with accuracy and speed. Failure and imperfection are good signs in a practice session! They indicate that we are pushing the skill to become stronger and more diverse. 

A challenge can be almost anything; such as adding distance, speed, a new layout of equipment, a new location, or any number of changing variables around the equipment. 

In our weave entry example, we might alter the distance from tunnel to weaves or we might alter the shape of the tunnel from a ‘C’ to straight to get more speed.

3. Set Boundaries

Keeping the focus on a specific purpose or skill throughout a training session is the whole point of quality training. It requires us to set boundaries around what to reward and what criteria to maintain.

Before entering a training session, identify what behaviors you are looking to reinforce; what will you be rewarding and how? Are you using a mark/clicker? Are you using treats or a well placed toy? A few minutes of detailed thinking improves quality! 

In our weave entry example, we would reward the first pole with a clicker mark. The focus is solely on the weave entry, which eliminates training other behaviors such the send to the tunnel or a sit stay. 

When training our dogs, we often encounter a “pick your battles” situation. This happens when the dog presents an undesirable behavior while completing the skill you are training. 

In the weave example, the dog may break the stay or pop the last pole. Now what? It’s easy to begin training multiple skills, the stay, the weave entry and 12 pole commitment within one training session. This creates an unproductive, frustrating training session for you and your teammate.

With a known purpose and boundaries, we would reward the weave entry and eliminate or reduce other issues. A restrained send eliminates the need for a wait. Using 6 poles instead of 12 eliminates the popping at 10. Those skills can go on the list to be deliberately addressed in their own training sessions. 

4. Review

After the training session has ended, we take time to review the purpose, the challenge and boundaries that were set prior to the session. 

We use this check-in to decide what to practice next! 

Interested in seeing this process in action?
Keep an eye on the Agility and Beyond Facebook next Tuesday (2/18) to join Kat for a training session with her up-and-coming super star, Flash!

Want to stay connected?
We work every day to expand our minds, enhance our bodies and improve our teamwork. Our Weekly Walk-Through provides you with an insider’s perspective of how we continually better ourselves.